-2.png?width=156&height=60&name=Hawkin%20Logo%20(2)-2.png)

Analyzing Data in the Cloud
The Hawkin Dynamics software makes it extremely simple to analyze your data without the need for exporting. We are even in the process of making it better with our next cloud update (more information soon). However, we understand that some users like the ability to export their raw data and either process it themselves or upload it into a third-party athlete management system (AMS).
Within the cloud, there are multiple options to export: exporting from a filter for an individual athlete or a group of athletes or exporting from averages & scores for a single athlete. These options are explained in detail below.
Option 1: Exporting from a Filter
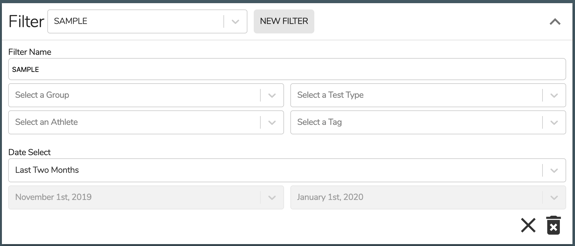
The "Filter" feature is available in the dashboard after you select your team. The filter box is located in the top right corner of the screen. Select the drop-down arrow and click "New Filter". After naming your filter you have the option to fully customize this filter.
1. Select the group (i.e. position type, school year, return to play, etc.)
2. Select the athlete(s) you wish to include in the filter
3. Select the test type (i.e. countermovement, squat jump, isometric test, etc.)
4. Select a tag (if applicable)
5. Select the data range for the filter. Build-in options include last session, today, yesterday, last week, last two weeks, last month, or last two months. You can also select a fully custom date range.
6. Name the filter to save it and use at a future time
Close your filter by clicking the arrow in the top right corner (the same one you clicked to drop it down). After you close the filter box your selected filter will be shown below in the "Tests" box. These tests are the individual data points that you selected in your custom filter.
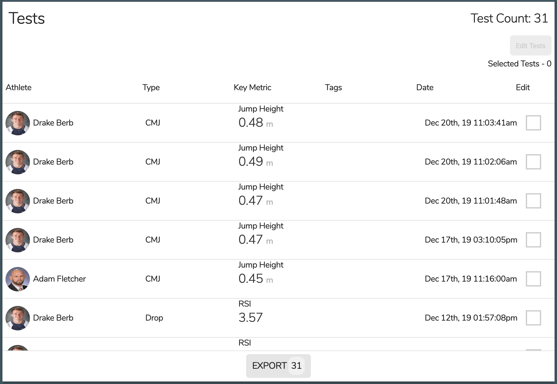
Pulling the data from the cloud: select the export button at the bottom of the "Tests" box. Once selected you will have the option to choose from "Tests, Averages, or Tests & Averages". By selecting "Tests" this will allow you to export all of the available tests within the selected filter (31 tests in this case). By selecting "Averages" this will allow you to export only averages for each individual day. For example, if you have an athlete jump three times per day, the averages will automatically be calculated when you export the data and the individual data points will not be pulled. Finally, you also have the option to export both "Tests & Averages" where both of the above will be pulled from the cloud into CSV format.
Option 2: Exporting by Athlete
You also have the option to export data from the cloud by selecting an individual athlete. Open the menu bar on the left-hand side of the screen. Once open, select "Averages & Scores" - in the top left corner select the desired athlete. You can only select one athlete at a time from this location.
On this screen, you have the option to compare athlete averages over a selected data range. Data range options are fully customizable. Once you have selected the data range a graph will appear in the right corner (shown below).
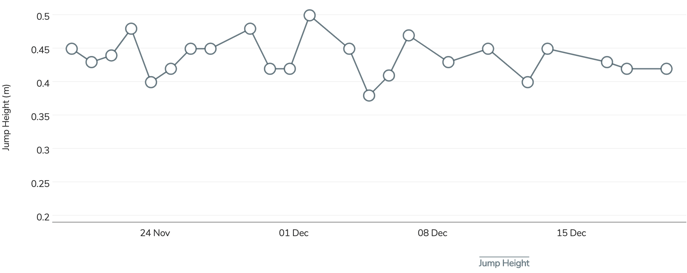
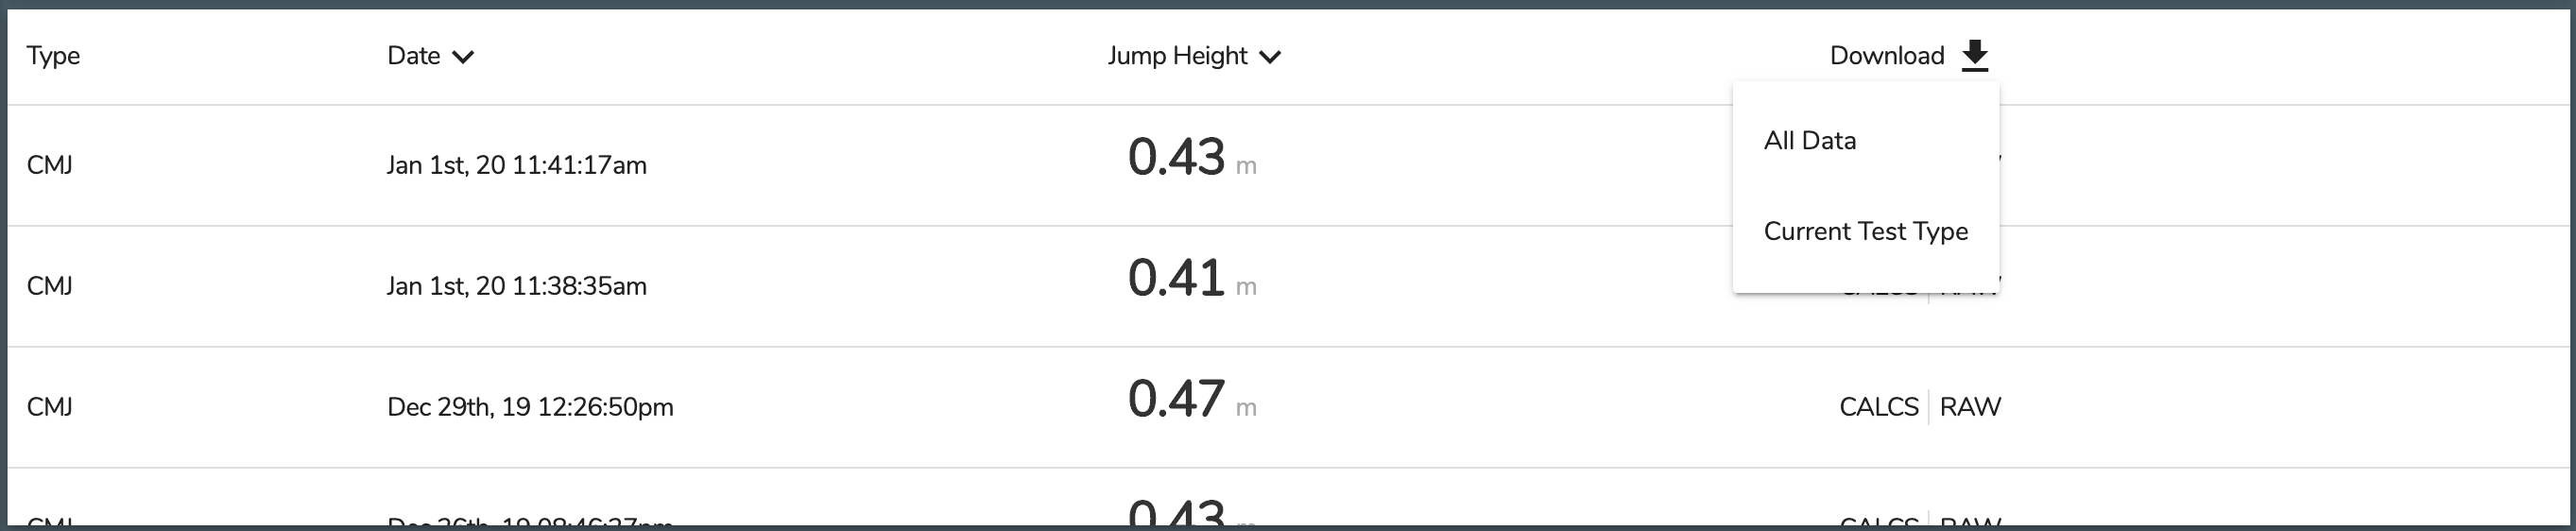
Below this graph, you will also have the option to export the data points from this selected data range. By selecting "All Data" you will pull all test types from this date range. By selecting "Current Test Type" you will only pull the selected test type from the athlete you selected.
Important Note
It should be noted that when you export your data from the cloud, only the "Active Metrics" will be exported. Active Metrics can be selected (or deselected) by going to Settings > Metric Settings and choosing from a list of metrics for each test type.